0,00 €

You have no item in your shopping cart
In a world full of sewing techniques and tricks still waiting to be discovered, new “Barba Tricks” couldn’t be missing to help save time and effort in your tailoring projects. Here is the 2nd post about sewing tricks.
For those who don’t know, this column was originally featured in the Secret Times newsletter, but due to the many requests from those who had missed previous issues, I decided to bring it to the Blog as well.
If you haven’t read it yet, you can find the first article about other “Barba Sewing tricks” HERE.
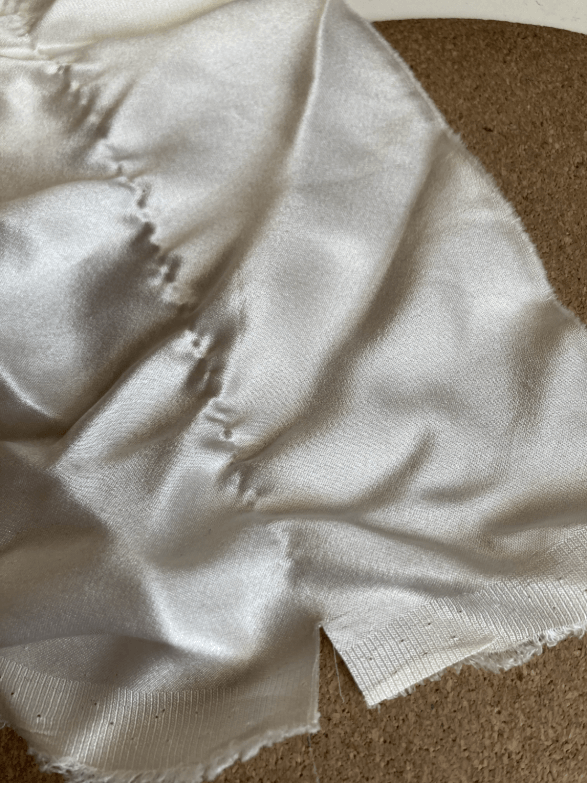
So, you’ve just finished sewing your pants or shirt. Now, all you need is the buttonhole! Easy, right?
So you take your sewing machine
and try to make the buttonhole.
You take the buttonhole cutter in your hand and stick it in the center of the buttonhole to cut.
The fabric is a little harder to cut than expected, so you put some extra force into it and..
..you lose control of the buttonhole cutter and cut past the buttonhole itself, ruining your whole creation right at the last step.
It’s not fun!
Speaking from personal experience, it is really demoralizing when this happens. .
So one day while surfing the internet, I found a very useful hack for buttonholing.
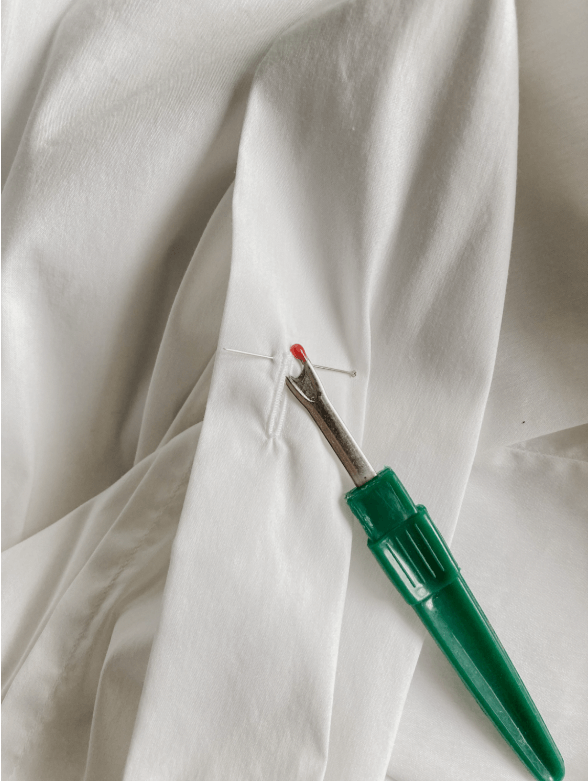
For this trick, you will only need a simple pin.
Here’s how you do it, place the pin at the end of the cut you want to make, and in this way, even if you apply too much force, the pin will prevent you from ruining the piece of clothing.
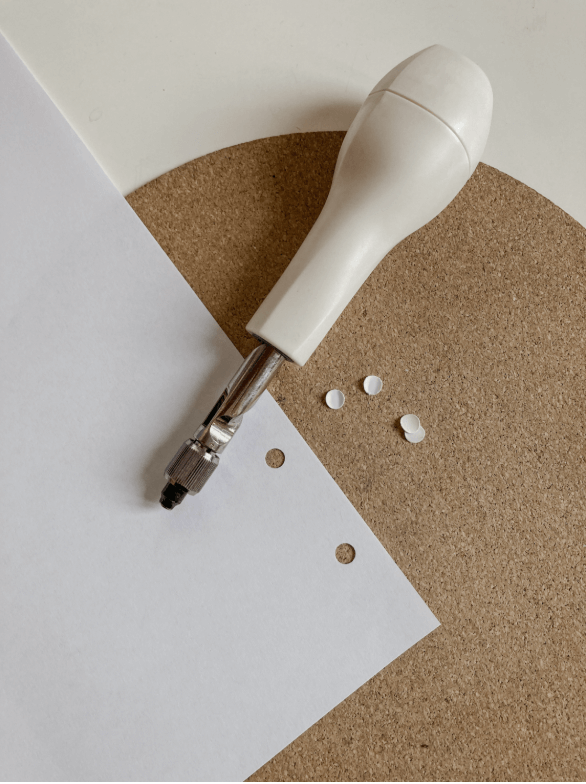
If you’ve ever made a corset or a lace-up closure, you’ve likely experienced the annoying neck and shoulder pain caused by punching multiple holes with standard hole pliers.
That’s why discovering this tool was such a game-changer—it allows you to punch holes in fabric or leather with simple pressure, without sacrificing your hands.
Thanks to its screw mechanism, punching holes has never been this easy—try it and see for yourself.
You’ve found a fabric you love, but there’s no composition label. Still, you’re set on buying a 100% natural fabric—for ecological reasons, quality, or historical reenactment needs. So what can you do?
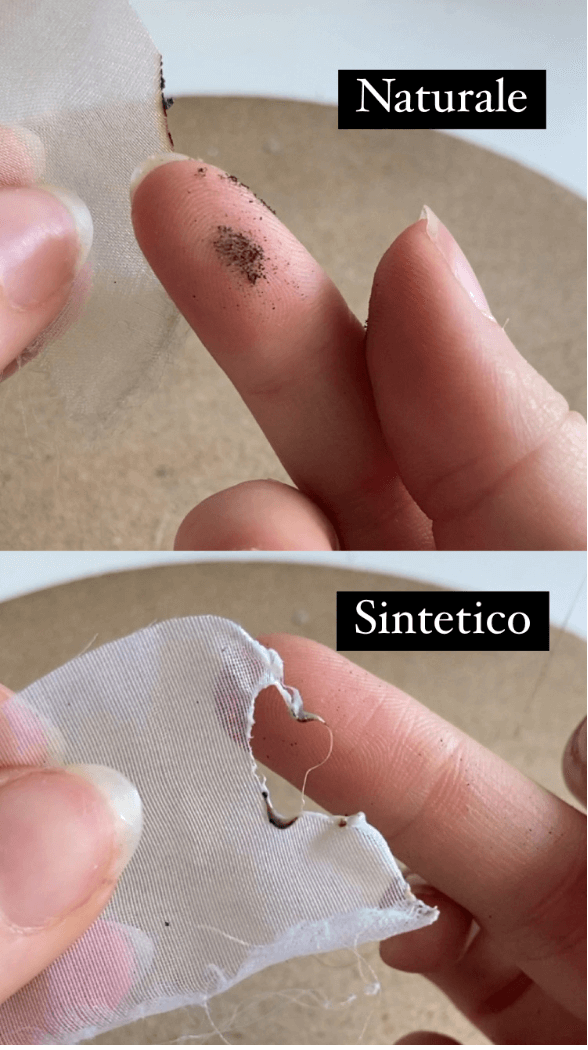
The absolute quickest method is… grab a lighter and set it all on fire! 🔥
No, I haven’t gone mad. Of course, I suggest you cut a small strip of fabric and burn it in a safe place (for example, over a sink). In short—try not to set your whole house on fire, okay?
Now that you’ve burned your fabric sample, all you have to do is observe the result. If it forms a black, stringy substance that hardens into a small bead once cooled, then the material is synthetic.
If what’s left is ash, then the material is 100% natural.
Try it for yourself—but be careful, please! 😅
The bias of the fabric has countless properties that sometimes seem almost magical. Have you ever wondered why when you see a bow, the ends are cut along the bias line at a 45° angle?
The answer is very simple: at 45°, the ribbon does not fray.
Try it to believe it!
Some fabrics—no matter how hard you try—always seem to end up crooked when cut. For example, voile, satin, and linen. But there’s a trick to ensure a perfectly straight cut.
Start by cutting about 2 cm into the fabric edge at your desired width. Gently pull a thread perpendicular to the selvedge, and you’ll see a clear line appear in the weave. Cut along that line, and voilà—you’re done.
Give it a try!
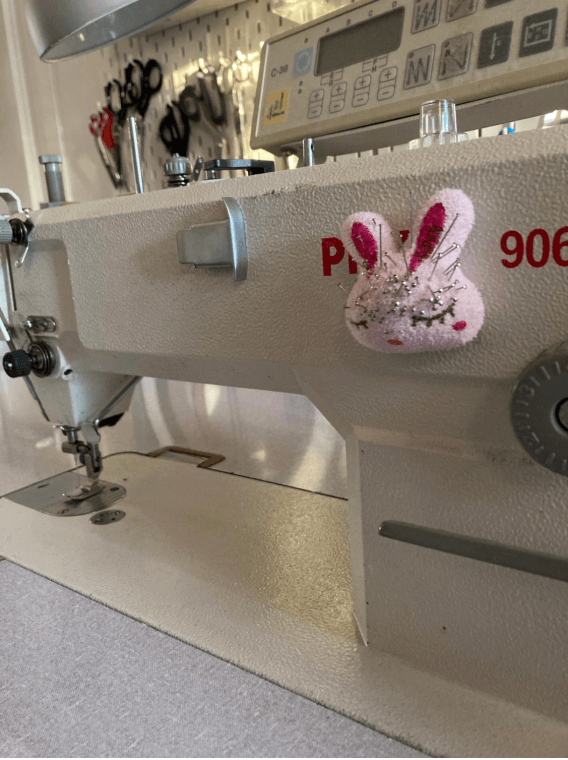
Always have pins ready!
Surely, you’ve sat down at your sewing machine, started sewing, removed the pin holding your fabric in place, and then thought…
Where on earth did I leave the pincushion?!
Because let’s face it, the pincushion is always where we aren’t. It’s a mystery we can’t explain.
How did I solve the problem?
I added one of my favorite keychain plushies to my sewing machine using a piece of double-sided tape (you can also use hot glue if you prefer). A handy “upgrade” that makes your sewing machine cuter but, most importantly, makes you happier.

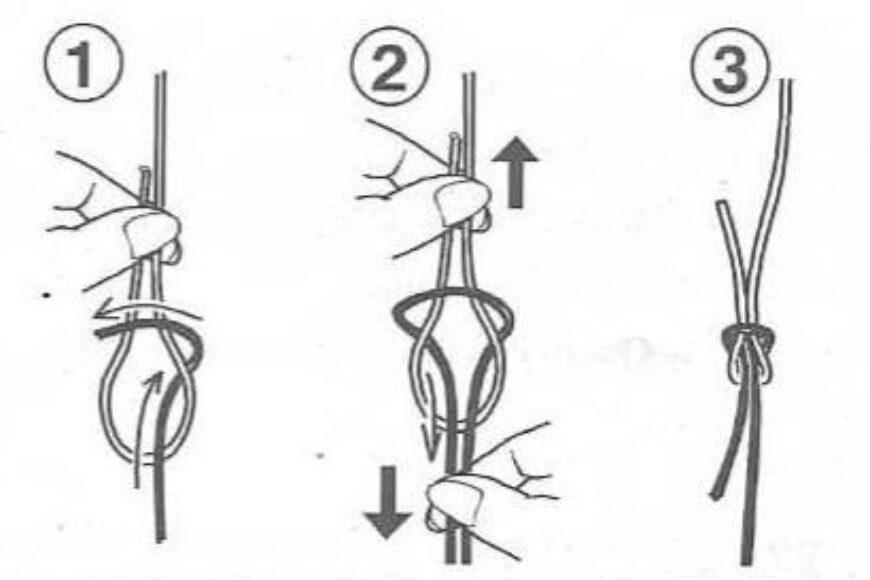
Changing the thread on sewing machines and sergers is always a hassle. But ever since I first read about this knotting method, for tying the two thread ends together, which allows the knot to pass through the needle’s eye, it has become much quicker and easier.
Just cut the thread close to the spool, take the end of the thread already threaded in the machine, and knot it following the steps in the image to the new thread.
Try it to believe it!
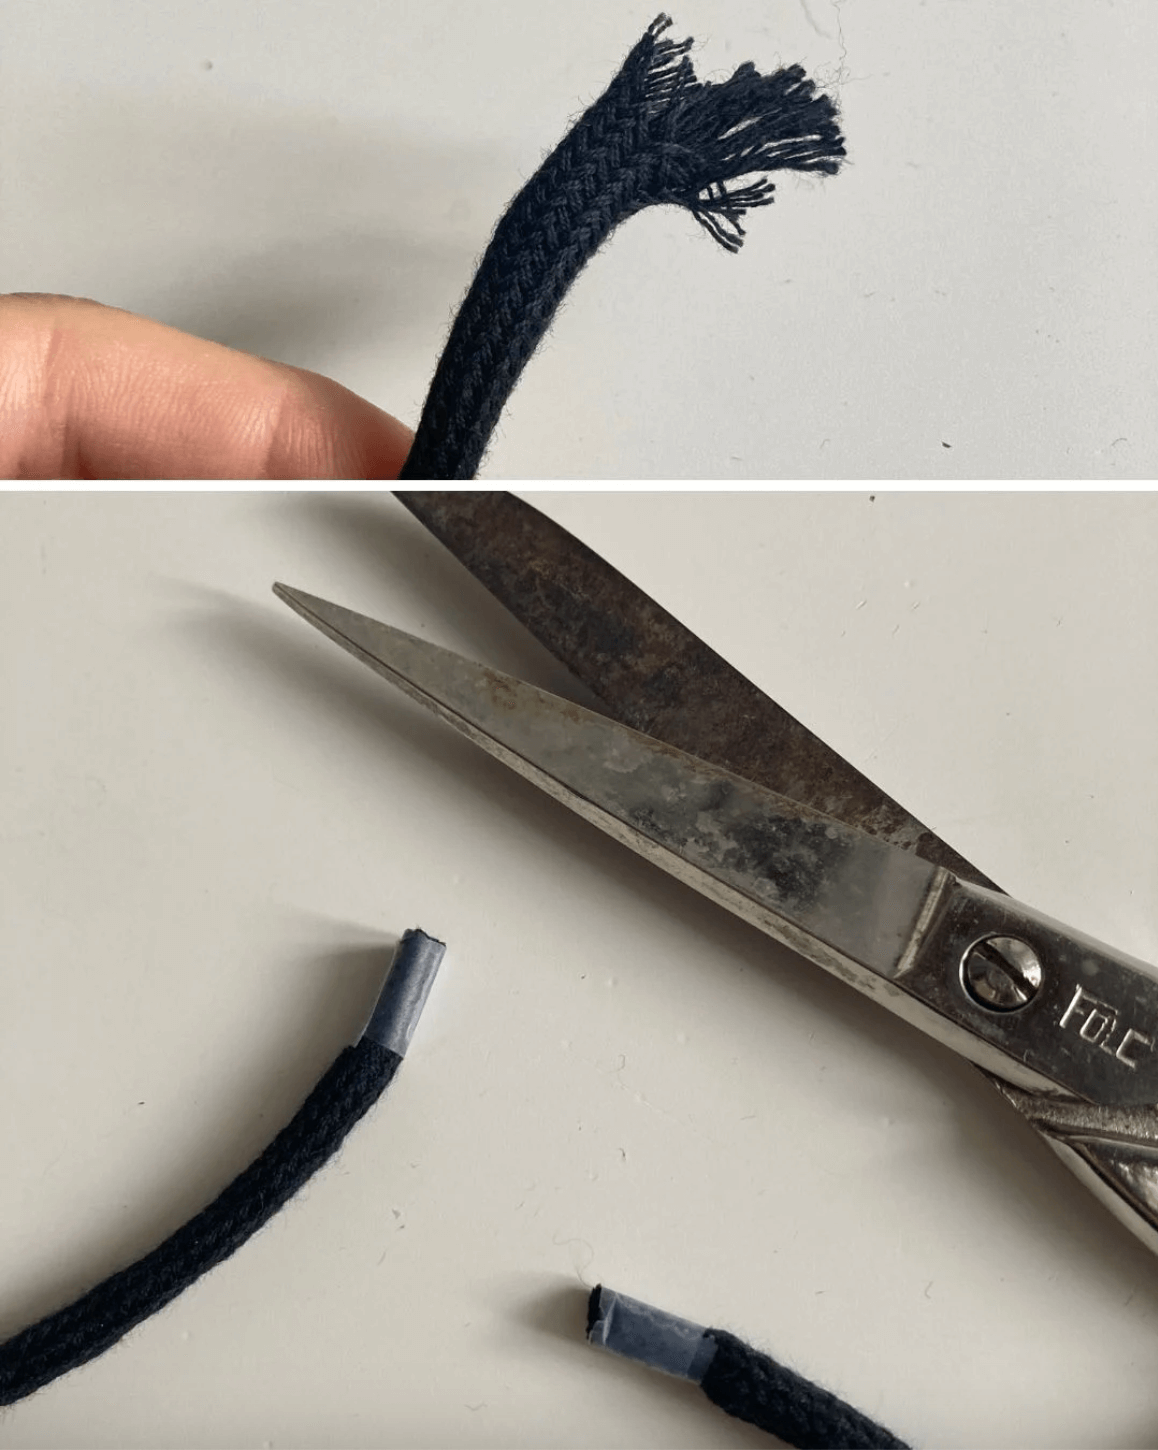
If you’ve ever had to cut any kind of rope, you’ve probably noticed that, almost instantly, it starts to fray, turning into a beautiful tassel. This can be a problem because, inevitably, the next time you use it, part of the rope will have to be discarded, wasting valuable material.
To avoid this unpleasant issue, all you need is a quick and simple trick: Wrap a small piece of tape around the section of rope where you want to cut. Then, cut right through the middle of the tape.
This way, both ends of the rope will remain perfectly intact.
This Site uses certain types of technical cookies necessary for its correct functioning, as well as statistical and Profiling cookies from third parties. If you wish to deny consent close the banner by clicking on the X placed in the upper right corner and this will result in the default settings remaining in place and consequently the continuation of navigation in the absence of cookies or other tracking tools other than technical ones. If you want to accept all cookies, click on accept all, if you want to independently select the cookies to accept click on Manage Settings. If you want to learn more check the Privacy Policy
 Italian